- Materials:
- Sherwin Williams Creamy Semi-gloss arylic paint
- Minwax dark walnut stain
- Minwax Polyurethane Rub on varnish
- A mini sander, paint brushes, and paper towels
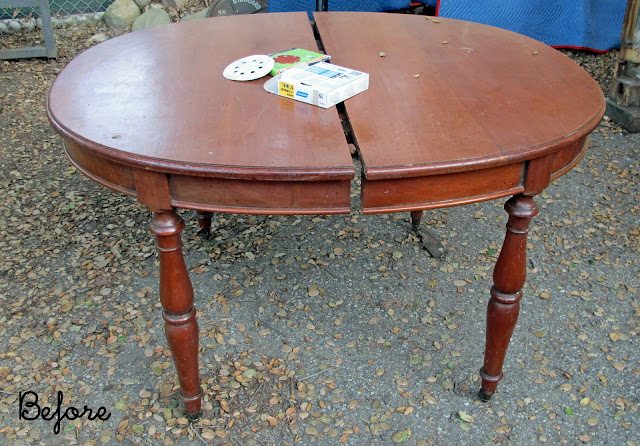
This was a long project in the making and I have to credit this tutorial from Miss Mustard Seed for her really good directions on stripping and redoing my table and chairs. Although I have done lots of refinishing this was a new technique and I wanted to try something from her blog since I love her style. It took me awhile to do this project, as I would work outside for about an hour at a time. I started in early July and was happy to have it finished by the end of summer !
To sum up Miss Mustard Seed's tutorial here is what I did:
- I sanded the varnish off the tabletop completely. If you are going to restain you need to remove everything.
- I roughly sanded the varnish off the parts I was going to paint. I have to thank my son Oliver who helped with this. It took some real elbow grease. My mom told me later that I didn't have to sand the parts I wanted to paint but that I could have primed them instead. Thanks mom!
- I painted the chairs and table legs with 3 coats of Sherwin Williams Creamy.
- I then sanded the white painted parts to distress them a bit.
- After sanding, I dipped a paper towel in the dark walnut stain and rubbed lightly onto the furniture. I immediately took a clean paper towel and wiped as much of the stain off as I could. This gave the distressing a more natural and aged look.
- For the tabletop I rubbed on 3 coats of the Minwax dark walnut stain and after that dried, I rubbed on 5 coats of the Polyurethane varnish.


great make-over! thanks for leaving a message on my blog. The first posts on my blog were written in Dutch, I'm from Belgium. And about the designs, I mostly use Burda patterns, my mom has almost every Burda from the 90's till now, so I have plenty of choices :)
ReplyDeleteI love this table. I have been looking for a table to redo for my own kitchen. Great Job.
ReplyDeletewww.shabbytochicqueencreek.blogspot.com
I have a similar dining room table and 8 chairs. I've also been planning a similar 're-do' for it. The biggest problem with the table is the grooves in it, every 4" - I hate those things!!! They will be filled in, then refinished. The chairs are 'distressed' from the factory, and they just don't look distressed the way I would distress them. Gee, talk about picky! lol I'm just not sure when I"ll get to this but I sure enjoyed seeing your transformation!
ReplyDeletewhat a beautiful refashion of the dinning furniture set. They look so much more chic now!~ Well done!
ReplyDeletelove,mongs
mythriftycloset.blogspot.com
thank you thank you thank you!!!! I've been pinning photos of table left and right for inspiration for our hideous table...out of all the white bottom brown top tables I've been pinning, yours is by far the best!!! I absolutely love it! Now I need to go steal my moms vintage high chair!! Thanks for sharing!!
ReplyDeleteAnnalisa
www.lungfam.blogspot.com