Image Map

Sunday, October 30, 2011

New Sewing Nook Reveal


I have been busy fixing up my sewing corner this week. Do you ever look at a part of your home and suddenly you see it with new eyes, like you woke up and finally noticed it how shabby it has become? My little sewing corner in my dining room was terribly dreary. After doing my dining set refashion it looked even sadder than ever! Mabel, my 1948 Kenmore, and her table were looking sad and worn, her table's 1948 shiny varnished exterior cracked and worn. The walls were bare and drab too, and the big black office chair was like a bull in a china shop, hulled over there in the corner of my dining room."What an uninspiring little spot", I thought to myself,"I should do something about it!"
I started off by sanding down the sewing table and applying dark walnut colored stain onto the top and painting the rest of the desk a distressed white. I used the same technique as I use on my dining table here. I used the leftover materials from the dining table for this project.
I took a thrift shop bought bulletin board and trimmed it with upholstery webbing, crochet trim, upholstery tacks, and added a flower pin to the corner. The only material bought for the project was the webbing which was 1.50$.
I had a flowered hook bought from Anthropologie a few years ago and screwed it to the wall so I could hang up my scissors instead of having them banging around in my desk. I can also now hang up my measuring tapes instead of constantly misplacing them.
I hung up a couple of thing I love too, a butterfly display Richard brought to me when he went on a Panama trekking expedition, and an old pharmacy sign I bought at a flea market in Paris which is a nice memory of a trip I took to visit one of my best friends and where we spent Gigi's first birthday. We went to a cafe for her birthday and Gigi threw two glasses onto the ground and smashed them!Gigi is actually named after St. Genevieve, the patron Saint of Paris. The pharmacy sign is magnetic so I can finally hang up my magnetic letters! Above the sign is a little metal flowered plaque I bought at a garage sale for a dollar.
I moved the big black Aeron desk chair which was super comfy but hideous looking in my dining room back down to Richard's office and instead put a little turquoise swivel chair I got for free on the roadside at my sewing table. I made a little slip cover for it from some leftover fabric I had from some vintage curtains I had bought at the thrift shop and blogged about here. 

The funny thing is a friend who read my blog saw those curtains I bought and had blogged about and wrote me to say they had been her grandmothers and she had given them to the thrift shop and was so surprised to see them on my blog! She was having thrifters remorse, whereby you see something you gave up to the thrift shop and then wish you hadn't. But she didn't really want the fabric because she didn't sew and it didn't match her home. Well, she was pregnant at the time so I made her a nursing cover from the fabric. That way she could have a nice memory of the fabric she loved. And here is the fabric again on my slipcover. Don't you love it!
So now all these little items I love and have blogged about now have a home!
I will be posting soon some tutorials for some of the projects I made for my sewing nook this past week which will be:
  • How to make an upholstery webbing trimmed bulletin board
  • How to properly apply glaze to a furniture antiquing project
  • How to make an office chair slipcover


Photobucket

Thursday, October 27, 2011

Halloween Costume : The Girl Who Fell To Earth

Last night there was a strange noise in the bushes, like a crashing sound. I went outside with my flashlight and there was this frightened creature crouched in the bushes!


She took off running and I yelled to her " Wait, we won't hurt you! We are peaceful humans. How did you get here?"

She stopped , struck a pose, looked at me and then stared up into the sky. I had to admit her outfit was fabulous and I wanted to learn more about her planet but sadly, she only spoke in a gibberish I couldn't understand....
This costume was developed on my dress form. I had a block about what to do so I just started draping the shirt and cutting it here and there. To make it stick out I sewed boning to the inside. For the shorts I traced some of Izzy's leggings. I think they are too tight and short and I will be making some sort of skirt to wear over the shorts before I let her out on Halloween, much to her chagrin! I love making costumes because you can sort of just throw them together and don't need to do any finishing on the inside! Finishing is the boring part for me and I often get frustrated at the finishing stage because I just want to move on with something new by that point. Sewing ADHD. 
But I love how these photos turned out so I wanted to post them anyway. For the boots, we got some old thrift shop clodhoppers and hot glued the fabric on to them and we added some little boned "wings". What do you think? Do you think it needs a skirt? Or maybe some opaque tights under the shorts instead? Your comments will be appreciated!


Photobucket

Monday, October 24, 2011

Upholstery Webbing Christmas Craft Ideas


I love vintage grain sacks and burlap decorating. It's getting to be that Christmas crafting time again soon!

Upholstery webbing has the same sort of vibe and it is really cheap, about 50 cents a yard. I think it is a great material to craft some Christmas projects with. Here are fun  craft and decorating ideas I pinned recently:


Photobucket

Thursday, October 20, 2011

French Country Glazed Creamy Painted Dining Set : Mini Tutorial


  • Materials: 
  • Sherwin Williams Creamy Semi-gloss arylic paint
  • Minwax dark walnut stain
  • Minwax Polyurethane Rub on varnish
  • A mini sander, paint brushes, and paper towels
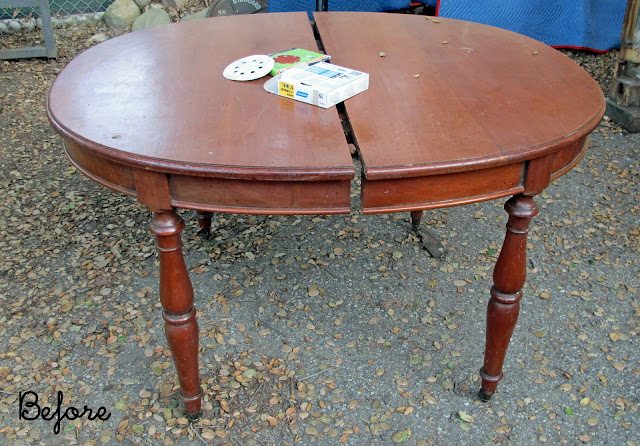
I had a great French table in my garage but it had some deep scratches on it from being moved around carelessly. It had some lovely matching chairs but over the years most had broken and I only had a few left so I was thrilled to find a set of six similar style French country style chairs at a local thrift shop. When I looked on the bottom I found they were from the catalog Ballard Designs and they were originally really expensive! Love that. I also love the antique white look and the finish on the chairs and table didn't match so it was a perfect opportunity for a furniture refashion.
This was a long project in the making and I have to credit this tutorial from Miss Mustard Seed for her really good directions on stripping and redoing my table and chairs. Although I have done lots of refinishing this was a new technique and I wanted to try something from her blog since I love her style. It took me awhile to do this project, as I would work outside for about an hour at a time. I started in early July and was happy to have it finished by the end of summer !
To sum up Miss Mustard Seed's  tutorial here is what I did:
  • I sanded the varnish off the tabletop completely. If you are going to restain you need to remove everything.
  • I roughly sanded the varnish off the parts I was going to paint. I have to thank my son Oliver who helped with this. It took some real elbow grease. My mom told me later that I didn't have to sand the parts I wanted to paint but that I could have primed them instead. Thanks mom!
  • I painted the chairs and table legs with 3 coats of Sherwin Williams Creamy.
  • I then sanded the white painted parts to distress them a bit.
  • After sanding, I dipped a paper towel in the dark walnut stain and rubbed lightly onto the furniture. I immediately took a clean paper towel and wiped as much of the stain off as I could. This gave the distressing a more natural and aged look.
  • For the tabletop I rubbed on 3 coats of the Minwax dark walnut stain and after that dried, I rubbed on 5 coats of the Polyurethane varnish.
I love how it turned out!


DIY Showoff


Photobucket

Tuesday, October 18, 2011

Handmade Gift: Folding Market Tote


 If you are a sewing blogger or visit them you have probably become accustomed to seeing the beautiful and amazing creations in the blogoshere and may have even become what I call a little sewing " jaded". Some of the projects out there are so amazing we forget that the majority of people in the real world don't really sew and who doesn't appreciate getting something handmade?
 I was invited to a friends' birthday party over the weekend and needed something cute and quick as I had about two hours before I had to leave. Yes that's me the queen of procrastination! So I whipped out a book I haven't looked at for awhile," One Yard Wonders". It's One of those cute, crafty books geared toward beginning sewers you can find at bookstores. But I have to say that the projects in the book rock as far as making gifts go! They are all quick projects that take a yard or less of fabric and readers, I like anything that can pare down that mountain of fabric bins I have in my back room!
I decided to make theding market tote. At first, I thought it was bit dull for a gift and wanted to make my friend something more snazzy but it really is one of those practical things everyone can use and let's face it , she might not wear the giant fabric hair clip I was going to make for her. But to hear the Oohs and Aahs when she opened it! There I was all set to apologize for my lack of imagination for her gift but she really seemed to like it!
Anyway, One Yard wonders is full of useful little projects that would be great for gifts with the Christmas season coming. I highly recommend this book. It come with dozens of sewing patterns too. Seriously folks, there are over a hundred projects in this book!
Photobucket

Saturday, October 15, 2011

Sister Dresses and Sew Chic Saturday

So I know many of you out there in blogland are sewing for autumn but here in California it has been in the 90's all week and I can't possibly be thinking corduroys and tweeds yet. I made these matching dresses dresses recently. I used an old but seemingly unused bed sheet I bought at the thrift shop for the fabric . I took basic a line dress patterns, added under bust bands to them, pockets with ruffles on the larger dress, and I added a ruffled hem to the smaller dress. I think they look so cute together but Izzy my older girl, won't be caught dead wearing a matching dress with her sister so I just may have to borrow it! Gigi is next in line as there is still plenty left but the cold weather is coming and I have some other projects lined up for her.


Creative Itch


Photobucket
Related Posts Plugin for WordPress, Blogger...