Image Map
Showing posts with label patternmaking. Show all posts

Tuesday, September 25, 2012

Making the Mini Chanel Jacket

Today I am sharing a bit of the process it took to make my Chanel inspired Little Black jacket.
 
I used the pattern block I made for Gigi to make the jacket pattern. I added some width on the side to make it roomy enough to fit a blouse under and a button placket on the left side. There are no collars on Chanel jackets so that part was easy. I used the basic sleeve pattern I drafted too.

Chanel jackets are made from soft and loosely woven boucle fabric. To give the jacket body without adding cheap iron on interfacings or stiff innerlinings like horsehair canvas, Chanel jackets have a lining quilted to the body fabric like above. You have to leave enough space at the bottom and the side seams because the lining is folded under and hand stitched into the jacket using a fell stitch.

Can you see here how the lining is just folded under and stitched in place? It seems so simple but this is a method often used in couture sewing.  The entire lining is hand stitched.

I really messed up on my buttonholes!
Patch pockets are lined, then attached by hand with a fell stitch. Then the fringe trim is sewed on.
This is an example of a perfect fell stitch, used often in couture sewing. My stitch is a lot messier than this!

Once the jacket is complete minus buttonholes, the trim is then added. I made this fringe trim and sewed a stay stitch with about 1/2 inch allowance on both edges. Then I unravelled the threads to get the fringe look. It only unravels as far as the stay stitch line.

There are lots of other details used on Chanel jackets, like chains sewn inside to give weight to the coat, hand sewn buttonholes and two piece vented sleeves, but that would all be wasted on my three year old who went in this suit and tried to climb a tree with her brother after the photoshoot was over!

Well, I am tired of this type of sewing.... It is so detail oriented. Although I appreciate this type of work, it's not something I like to do too often except for special occasions.
I am excited for this week's white sheet challenge where I  can get my hands dirty and just see what happens!


Pin It


Monday, September 17, 2012

La Vie En Rose: Making Gigi's Dress


Well, the first week of Project Run & Play is over and I managed to squeak through.
I have been keeping a photo diary of some of the steps I took to design my dresses.

Inspirations.....

Sister, 1915
You can find these photos on my Pinterest boards

I wanted to design something that reminded me of an early twentieth century child.

Some of my designing process or what I remembered to photograph......


Above is the dress before I made a new, flared sleeve the skirt straight.


Have a nice week!


Pin It

Thursday, August 30, 2012

Making A Basic Pattern Block

Even if you are new to sewing there is no reason why you shouldn't be able to make your own patterns.
Making a pattern can be easier than sewing!

And sometimes you just can't find the style you want so you have to make your own...

If you can follow a recipe you can make a simple pattern.
But you do need a good patternmaking book to follow, and a few tools, just like you need a good cookbook and the right tools when you are learning to cook.

When making your basic blocks, precision and accurate measurements are the most important things because you will use the BASIC BLOCKS to make all of your designs from and if the basic block fits well, then a lot of your work is done....

This week I made a basic block for my three year old.

I used the book above  called Metric Pattern Cutting For Children.

I have many pattern cutting books and this is the only one I have EVER found that is geared for children. 
So if you want to learn to make your own kids patterns you should buy this book,
The good thing is the book is very easy to follow and the patterns fit really well if drafted accurately.

These were the directions I had to follow to make my basic pattern block, which I will later use to design some clothes.
You have to take a LOT of measurements which is the hardest part with a wiggly kid.
However, my nine year old was no problem !


Here is my basic block for my three year old. It took some concentration and I had to take the measurements with a metric ruler.

Since doing this basic block I have made another one for my nine year old and I used my regular imperial ruler. But I have to say, doing the calculations were easier the metric way. How hard was it to figure out 1/16 of 7. 5 inches?!

Trust me, doing the math is easier using metrics!
A basic block does NOT have seam allowances. This allows for more accurate designs when you trace your blocks and cut them apart to make new designs.

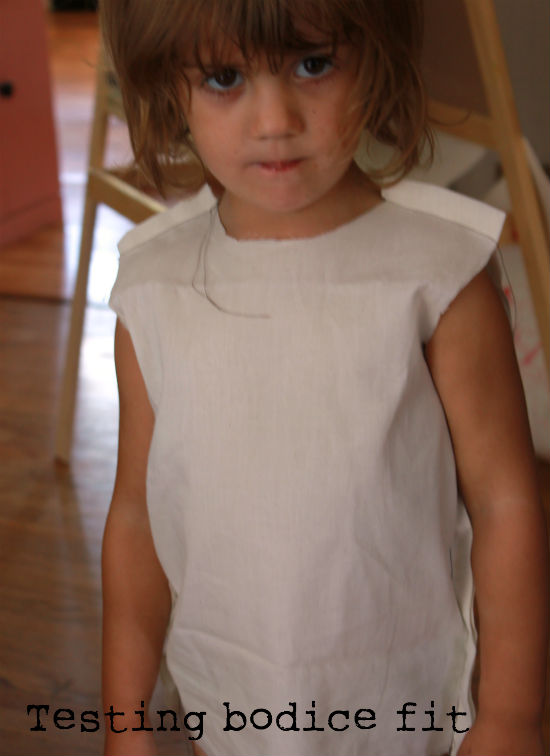
To make a muslin to check for fit, I traced my basic block front and back and sleeve for one side of the body.

Then I added seam allowances.

The fit was good!

Of course fitting a toddler body is pretty much a no brainer compared to the curves of an adult. The sleeve was about an inch too long.

But as I mentioned before, taking measurements for a wiggly toddler is another story altogether!

Stop by after the 13th and I will show you how I used my blocks to create the design I made for Gigi for Project Run & Play!


Pin It

Tuesday, March 6, 2012

making a pattern for a princess bodice minidress: a repost

I was going through some of my early posts from 2010 when I started my blog and I thought this one was an interesting one to share since I don't think anyone ever read it! It shows how to drape and then make a princess line bodice pattern.
This is the finished princess line dress. Isabelle picked out some bright Hawaiian print polyseter for 2 dollars a yard on our last trip downtown. I tried to talk her out of it because it was  synthetic and stiff , a fabric that frays a lot when you work with it. We decided it was like the fabric that a Barbie dress is made of so she designed a Barbie Dress for herself and I made it.
Draping a princess line bodice and adding style lines.
Checking fit.
Taping to a paper bag and adding seam allowances to make a working pattern
I drafted a half circle skirt directly on paper because it's easier than draping a circular skirt. I had to make sure the waistline matched my bodice pattern before I finalized it.
Isabelle in the Barbie Dress. Luckily her measurements are the same as my dress form so no changes in the pattern were needed.

Sunday, March 4, 2012

Vintage Modern Design Challenge Entry : The Grapes Of Wrath Dress, Spring Dress 2

I was inspired by the Vintage Modern Design Challenge on Burdastyle to make a dress that was modern but with a vintage feel.
I love the rural valley in California where I live and wanted to make something that was an ode to the farmers and migrants who made this place what it is.
If there was ever a writer who evokes the history and feeling of California it is John Steinbeck.
He wrote about just the kind of people who populated this valley back in the 1920's and thirties.
We are surrounded here by orange ranches that were planted by many of the migrant families that came here in the great depression looking for a new life after their farms in the midwest had been destroyed by the dust bowl crisis.
They planted oranges and this valley came to be known as "The Citrus Capitol of The World."
I had some purple linen lying around.

Voila, The Grapes of Wrath Dress.


I imagined a pretty girl who may have lived in this very house back in the 1930's. What could I make for her that someone would also like to wear today?


The godets, bias cut skirt, and raglan sleeves can be found on many thirties styles. They are also the main design elements I copied from two of Indygo Junction Patterns for the competition which is next week.
I added the buttons and crochet for a crafty touch and shortened the hem to make the dress more modern. Thirties dresses usually fall to mid calf.
I think these photos captures the light and feeling of California's ranches . They were taken with my new Canon T2i DLSR and I added the frames on Pixlr. 

The picture on this All Year fruit label is of the same valley pictured behind Isabelle in the photo above.

Fruit labels from the area where I live. It's one of the few areas left in California that still actually looks like these Old California images. It's one of the reasons I love it here so much.
I adapted this bias skirt for my design.

And I copied this raglan sleeve top with an insert for the bodice of my dress. I made it much more fitted.


Pin It Photobucket
Related Posts Plugin for WordPress, Blogger...