Image Map

Friday, March 29, 2013

The Skater Dress Tour: Tips For Sewing Knits


I love sewing with knits on my serger.
It's fast and easy and I get something made QUICK!
When Amanda from Kitshy Coo asked if I would like to try out her new SKATER DRESS PATTERN for her pattern tour around the blogosphere I said yes, because I thought it was really cute! And simple to make.

It's a simple knit T shirt top with a half quarter circle skirt. It has options for sleeveless and a long sleeved version as well.
I made the top from stretch cotton lycra knit and the red skirt from stretch woven fabric.
Gigi thinks it's very comfy! Plus she thinks she looks like a super hero in it. I think she looks more like a fast food restaurant worker! But a cute one.
I love those little Liberty like print sandals. We bought them at K Mart. Who would think? I wish they had them in my size.
One reason I like trying out other designers' patterns instead of just drafting my own all the time is I learn a lot of things from the designs of others.
It's always a learning experience to see how other people do things. Amanda from Kitschy Koo  had some sewing techniques I had never tried, but which I believe are used in ready to wear clothing. Her techniques made sewing this dress much simpler than my usual routine.

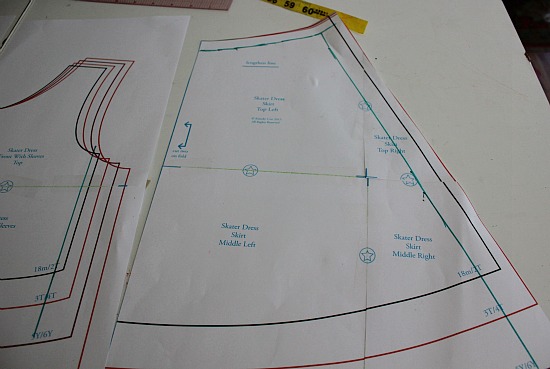
I started off by measuring the pattern, since I had a feeling it would be too big for Gigi. I can tell just by looking. Sure enough, the pattern in size 3T/4T had around a 23 inch waist about 4 inches big. So I altered the pattern before cutting out my fabric, saving a lot of altering trouble.
When sewing with knit patterns I don't add ANY ease so I just make sure the pattern is the same as mine or my girls measurements before I cut out my fabric. 
Sometimes it needs to be taken in even more, especially if the fabric is very stretchy.
When you make a pattern smaller than your measurements to allow for stretchy fabrics to stay up, it's called NEGATIVE EASE.

Amanda recommends hemming the sleeves before sewing them together, something I've never done. I think this technique is use when T shirts are made on an assembly line. In factories they try to sew most things flat, so they don't have to pin things. This really was a lot quicker than my usual method of hemming after the sleeve is done.
Another new technique I used was sewing on the sleeve this way ABOVE.  I like this method for knits and plan to use it more when I make t shirts. You lie the sleeve out flat and sew it to the armholes before their sides are closed. Then you sew up the side all the way to the end of the sleeve. However, this method will only work if there is no sleeve cap gathers.
I have only sewn set in sleeves before so this was new for me too.

So, that was a fun little project!

If you would like to see more sewing and craft related posts consider adding Sew Country Chick to your rss feed reader. Or follow with FacebookTwitter, or Friend Connect!


Tuesday, March 26, 2013

Shabby Apple Giveaway

It's been a little while since I checked out Shabby Apple's dresses and I was impressed by their new line of vintage style dresses for spring.
Here are a few of their adorable dresses.
While this is a classic vintage style the emerald green and black & white stripes are right on trend for this spring.
I don't always have enough time to sew up something cute for myself, between taking care of my four kids, my house, being cook, chauffer, and my husband's girlfriend. Something has to give once in awhile . So I give myself a break and buy myself a dress or something.


I love the sort of thirties/ forties vibe of this blue print dress.
No it's not a trip to Paris but a new dress is always a little pick me up isn't it?
Another classic style done done in pastels another big trend for spring.
How would yu like to enter a Giveaway to win a 50 dollar give certificate to Shabby Apple vintage dress line?

Click here to read more and enter my giveaway.....

Monday, March 25, 2013

My Life : The Early Years

Do you ever wonder about the people whose blogs you read? What their backgrounds are? How they came to be doing what it is they are doing? I do. And here is my story......well, the beginning part anyway....
My mom , myself, and my brother at The Grand Canyon. Boy was I chubby!

I started off life as a child in the Hollywood of the 1970's which is very different than it is today. My brother, myself and I lived in a little bungalow that Gary Cooper had once lived in, tucked off of Sunset Boulevard, near the corner of Sunset & Vine. My dad was a sound editor at he local movie studios and my mom was a budding artist. Funnily enough they had both hitchhiked to California, my mom to San Francisco to be a hippie, and my Dad to Los Angeles to catch a boat to Japan to take photographs, which he never did. They met on the beach in Venice beach. We were warned as children not to go up to Sunset Blvd. There were girls walking up and down the street there, wearing short shorts and big high heels. I thought they looked like Barbie dolls.
My dad, myself, and my brother in the 1970's

My mother didn't really sew much, although she knew how. Her generation had been taught in school in Home Economics classes. Those classes had been cut out of Los Angeles public school curriculums by the time I was in middle school. However, my mom did have a small business making and designing screen printed punk rock T shirts for a local boutique in Hollywood called Poseur. I used to love helping her hang her creations outside on the line to dry. Sid Vicious, The Clash....she made the coolest T shirts! Mom stopped making her t shirts around the time she and my dad split up when I was 12 or 13 when she went to work full time as a curtain and drapery designer.

My mom did have an old sewing machine and as a 13 year old punk rocker, I wanted to make a cool skirt I had envisioned. So I got her old Kenmore out and proceeded to jam the whole thing up. I was so frustrated I put it away and didn't pick it up again until I was 18.
I had signed up for a beginning sewing class at my community college. My crowning achievement in that class was a straight skirt with a zipper and a detached waistband. I was so proud of myself!


Me as a punk kid in the eighties.
When I was 20 my world was shattered when my brother Ian was shot and killed by some local gang members in a random drive by shooting a few blocks from our home. I had to identify him in the morgue of the hospital so my mom wouldn't have to.

His friends who were there and the neighbors who witnessed the incident were afraid to come forward to identify the killers because they were afraid of retribution from the street gang. But one of my brothers' friends who was there was brave and did come forward. It was known that there were several gang members involved but only one could be positively identified by my brothers' friend. This brave and loyal friend and his entire family had to go into a witness protection program and moved away. I didn't see them again until my the trial of Ian's killer.

After I ran into my brothers' killers' twin brother at the local car wash one day, I decided to leave LA for what I though was for good. I sold my car, dropped out of college and moved alone to Florence, Italy at the age of 20. I now realize that I was suffering from post traumatic stress syndrome, but at the time it seemed like the only logical thing to do.
The car I sold so I could move to Italy 
While in Italy, I studied Italian and art history at the local Italian University. It was just what I needed. To get away and forget for a little while.
When I came back the following fall for my brothers' killers' trial, I knew that what I wanted to do with my future was design clothing. So I signed up for a program at FIDM, a fashion design school in downtown LA.

Although my brothers killer was convicted for life, I still have to visit the prison every five years for his parole hearings and relive the incident all over again. It's always so surreal to see this guy, around my age, who is spending his life behind bars for what he did to my brother. 


If you would like to see more sewing and craft related posts consider adding Sew Country Chick to your rss feed reader. Or follow with Facebook, Twitter, or Friend Connect!

Saturday, March 23, 2013

My Draped Dress Failure

Do you ever start a project , realize it isn't going to work out , but keep soldiering on despite the fact that NOTHING you are doing is going to save this poor failure of a garment ?
Thursday I decided I was going to make a draped gown, and started documenting my progress on my Instagram feed.

 I first draped the dress in muslin, then tried to sew it up in a beautiful champagne colored knit jersey only to have to throw the whole thing away. After I realized what I had done wrong, I decided to make another attempt at my failed dress with some cheap purple jersey I had bought at a yard sale. I had continued my folds into the seam lines instead of smoothing them out to nothing. The drapes were only supposed to be in the center of the dress.

 It was looking pretty good but the draped part of the neckline had stretched out. Probably because that area was on the bias and the knit wouldn't behave. I tried attaching interfacing to the edge of the neckline but that made the matter worse. Then I sewed some elastic into it and it looked horrible with weird little gathers everywhere. I decided to use elastic thread and that wouldn't work either.


Finally I just decided to quit the whole project.
It's important to know when you have been licked!

But on the bright side, I did practice my draping skills.
With the purple dress I just pinned the fabric directly to my form. I was starting to feel very smug with my first attempt at draping this new style when I realized the neckline was a total failure.

I really do love the draped effect and will try this again sometime in the future but for now, I am so done with it!
This wasn't an original design anyway. I was practicing a project from my old draping textbook.
The art of fashion draping by Connie Amaden Crawford.
If you are wanting to get into the art of fashion draping yourselves it's an excellent book and guides you through all of the basics. This draped dress is one of the more advanced projects. You would start off with a basic bodice and a princess bodice and grow from there.
I love draping!

Funny how every time I start to feel like I am hot stuff I am humbled by a small detail.

Sorry I didn't post my link party this week. I was out late last night then went to pick up my son at LAX who is home for Easter. I will be back on schedule after Easter!

If you would like to see more sewing and craft related posts consider adding Sew Country Chick to your rss feed reader. Or follow with Facebook, Twitter, or Friend Connect!

Thursday, March 21, 2013

Tribal Print leggings : Drafting legging patterns

So this week I decided I needed some printed leggings after taking a trip to downtown LA  to buy some trendy fabrics to inspire me. When I spotted some tribal looking stretch lycra at Micheal Levine fabrics for five dollars a yard I snatched up a yard and a half. I have been loving some of the tribal style printed leggings I have been seeing lately and wanted a pair too !
pattern making leggings

This fabric wasn't the exact one I had in mind but it was close enough. I used a Burdastyle pattern from the website and after shaving it down I would say it is about three sizes smaller then the recommended size for my size which is 38. I wouldn't recommend this pattern to you because of the major sizing discrepancies.


lagging sewing pattern

Can I just say how frustrated I have become with sewing patterns that are way bigger then they are supposed to be?
I also have no excuse except sheer laziness to be buying patterns at all. I know how to make them and I also have three dress forms !
I have been wanting to start a pattern line for awhile now and have been busy working on some new designs for it. Stay tuned!


Gigi also needed some leggings and I wasn't about to go to the hassle of printing out another pattern and taping it together, only to have the fit way off again, so I drafted her a pair of leggings from my Metric Kids Pattern Cutting book. It was really easy to draft these leggings folks,and if you sew for kids you will love drafting their patterns too!

The book comes with default measurements for each child's age in case you don't happen to have a squirming toddler handy to take measurements on. I wasn't in the mood to take Lily's measurements so I just used the default ones in the book. They were a little big but with some minor adjustments I fixed the slight bagginess.
sewing leggings patternmaking
This was my pattern before adjusting. I added a roll over waist band to make them look like yoga pants.
making leggings pattern
This is the same pattern slimmed down a little. Not perfect but close!
The thing about drafting anything that is going to be made of stretch lycra is you have to take into account something called NEGATIVE EASE. The pattern actually has to be a little smaller than your measurements to fit right. Gigi's pattern I drafted doesn't have any negative ease so they fit more like normal pants. Next time I will make them a little smaller over to give the legging look.
After making Gigi's legging pattern I decided Lily needed a basic t shirt pattern that I could use to draft her a few spring dresses. Here is how her basic t shirt block pattern looks:
Voila Lily's basic t shirt block!

If you would like to see more sewing and craft related posts consider adding Sew Country Chick to your rss feed reader. Or follow with Facebook, Twitter, or Friend Connect!

Wednesday, March 20, 2013

DIY Bleached And Studded Cutoffs

DIY studded bleached cutoff shorts
Welcome to week two of the Sew Country Chick DIY Cutoff series!
This week we have a tutorial for making some bleached and studded cutoffs.
Thanks for modeling today, Emily!
DIY studded bleached cutoff shorts
DIY BLEACHED STUDDED SHORTS
INSTRUCTIONS:
Make sure the jeans you start off with are HIGH WAISTED. These are easy enough to find at the thrift shop. One way to tell if jeans are high waisted is there should be a few inches between the bottom of the fly and the bottom of the crotch seam. Try them on and mark where you want to cut them.
Mix one part bleach with four parts water. Stir the shorts in the mixture and make sure you saturate them. Do this outside because the bleach smells horrible!
Lay the wet shorts out in the sun until they get to the lightness you want. Make sure you wash them right away afterwards so the shorts don't deteriorate further from the bleach.

Draw guidelines so you attach your studs neatly. Isabelle used disappearing fabric marker.

When you poke your prongs of the stud in the fabric you will need to FLATTEN the prongs so you don't get poked when you wear the shorts.

A butter knife works great to flatten the prongs.

DIY studded bleached cutoff shorts

Voila!

Here is last week's pair of short sin case you missed them.
DIY Galaxy Shorts Tutorial


If you would like to see more sewing and craft related posts consider adding Sew Country Chick to your rss feed reader. Or follow with Facebook, Twitter, or Friend Connect!

Linked to

Tuesday, March 19, 2013

DIY Chalkboard stencilled herb box


I love to paint things and was excited to try out these Handmade Charlotte stencils , Folk Art paints, and chalkboard paint I received from the Plaid Company to try out. 

I made this herb garden box A La Francaise with the stencils, paints, and the chalkboard paint which I loved. It was my first time trying it. This was a fun project!

The Handmade Charlotte stencil kit was a frame theme as you can see below.
Here is how I made the box:
First I painted a planting box from the home store a creamy white I already had.
Materials:
Herb plants, potting mix, Handmade Charlotte Stencils, Folk Art paint, Chalkboard paint, potting soil, little wooden oval shaped plaques from the hobby store, a piece of sandpaper, wood stain in walnut, a Sharpie, and a rag.
I used one of the frames and the alphabet stencils to create the graphics. I traced them with a pencil and then filled them in with paint. The letters I filled in with a Sharpie. I mixed a few colors together to get this aqua green color.
I sanded the box to rough it up, then I rubbed a little walnut stain on the box to age it.
I painted the little plaques from the hobby store with the chalkboard paint and used some wood glue to glue them on.
Now I can just pop out my back door to pick these three herbs I probably use the most in my cooking .
Parsley, thyme, and basil!

If you would like to learn more about all of the cool products Plaid has you can:
Plaid on Twitter

Here are some other projects using the stencils and paint:


Disclosure:
I wrote this post as a part of a campaign with Plaid and Blueprint Social

If you would like to see more sewing and craft related posts consider adding Sew Country Chick to your rss feed reader. Or follow with Facebook, Twitter, or Friend Connect!
Related Posts Plugin for WordPress, Blogger...