Boy have I had a busy week! I went to Fabric Weekend and met about twenty new sewing friends . I laughed so hard with my room mate Mie from Sewing Like Mad. We all shopped for fabric, ate like maniacs, and stayed up late talking. I felt like a college kid hanging out with my buds and I miss them already! I could go on about how much fun we had but I'll be writing a post as soon as I get my photos edited.
I came home to have to plan a family birthday party party for my youngest who turned four Monday, and the next day my older daughter was graduating from high school! Let me tell you having a child graduate from high school will really turn you into a bowl of jello. You will feel some weird feelings, maybe. Relief and surprise that you were able to raise a kid to this age without completely ruining her or losing her in a department store, sadness that your little girl is growing up and away, and wonder at how the years could pass so fast!
Well, I had to try to stop acting like a total space case, and think of a project to post for Melissa's Sundress Series PRONTO . I had been having a bit of a creative block due to my head turning into jello and my big hangover from my weekend away. The photos were supposed to be sent over that day and I had NOTHING. NIENTE. Was I going to have to e mail my organized and super together blog friend Melissa and reveal to her what a California flake I really am?
I have to mention here that you really NEED to go over and check out The Sundress Series to get some ideas for your summer sewing. It's a month long series dedicated to making sundresses. There are daily tutorials from a variety of sewing bloggers. Girls projects, adult dresses, easy ones, more advanced ones. Something for everyone there friends. Just in time for summer.
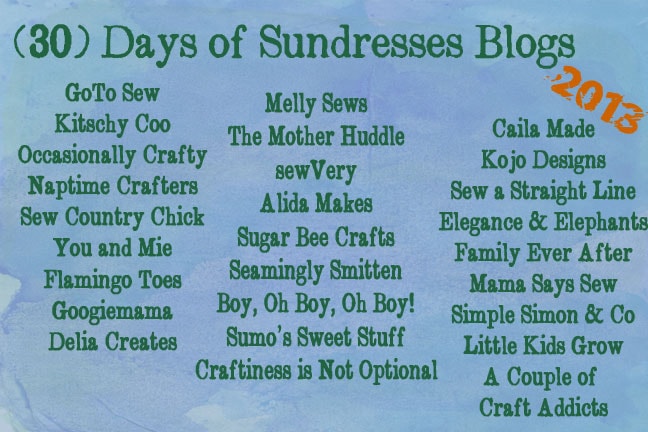
Below are all of the blogs involved in the series. Feel free to click on any name and you will be redirected to that bloggers blog. Aren't image maps cool?

Meanwhile, Isabelle found some funky silk fabric I had been hoarding for some future project and insisted she NEEDED a dress made from it to wear to her graduation THAT NIGHT.
The lightbulbs turned on and off in my head, one of them popped, there was some actual computing going on in there, despite feeling really scattered, and I came up with this simple dress to make that would showcase the outrageousness of this fabric.
This is the type of fabric you either love or hate. I love it. But I was giving it up for my baby's graduation dress.
It was 2 PM and the dress needed to be ready by 5:30. Could I really make the dress and pattern by then? Yes, and I did. It helps that this is a super easy project that any beginner could tackle. So there you have it.
THE HI / LO BANDEAU DRESS
The idea came from a dress I had already made in August of 2013, the Galaxy Dress. I had been meaning to write a tutorial for it because I had just thrown it together without a pattern the first time I made it, but hadn't gotten around to it....
Here is how to make your own hi lo bandeau dress pattern and sew it.
Materials needed.
2 yards fabric
3/4 inch wide elastic for bust and waits
First you will need a few measurements.
Full bust circumference. I'll refer to it as bust width.
Upper bust where the elastic band of the top will be over the bust and to the waist. I'll refer to it as bust length.
Waist to knee length.
Hip circumference.
Make the front and back bodice pattern piece.
Take your bust width and add 4 inches. This includes some ease and the seam allowance, 5/8 inch. Divide that measurement in 2 to use for the front and back pieces. You can draw it on flat paper or fold the paper in half and draw 1/4 of the total measuremnt. I always make my pattern on a quarter folded pattern to make sure both sides are identical.
Take your bust length and add 3 1/4 inches to allow for a one inch casing on both the top and the bottom, plus a 5/8 inch seam allowance to fold under.
Mark the fold line and the seam allowances on the pattern. You can also draw the grain line so you don't accidentally cut your fabric off grain.
Front Skirt Pattern Piece.
Multiply your total hip circumference by 1.5. Divide that number in half to use for the front and back skirt pieces.
Fold a piece of paper in half and mark the waist to knee points on the fold. That will be the skirt's center.
Measure UP from the knee point on the fold about 5 inches or however high you want the shortest part of the highest part of the skirt in the center to hit. Don't go too short now!
Draw the hem curve from the fold sloping down and end the curve at about knee length on the side seams.
I advise you to wait until you are done with BOTH pattern pieces before you draw in your side seam allowances. I didn't in these photos but it will make things easier. Just draw in your side seams, but leave some room for the seam allowances . Don't cut out the piece until you have made the back skirt piece.
Hope I'm not totally confusing y'all!
Cut a pattern piece about 8 inches longer then your waist to knee length measurement.Fold it the same as the front piece and mark the waist knee length on both the side seam and the center fold.
On the center fold measure down about 6 inches. Now draw a gentle slop upwards to the side seam .
When drawing the slope butt the pattern pieces right up against each other on the stitch lines. If you look at my side seams in the above left photo they are overlapping because I had already drawn in my seam allowances and was matching up the seam lines. This is why I would recommend waiting to draw in your seam allowances until last. You can do it either way.
Open up your front and back pattern pieces to make sure you find the slope of the pattern pleasing. I had to adjust my back piece because it looked too pointy.
Add 1 5/8 inches to the top of both skirt pieces for the elastic casing you will sew.
Draw your side seams. Make sure to square up your edges. Squaring seam allowances is a technique I learned years ago in fashion design school to make it easier to line up a pattern. Most industry pattern will have square seam allowances. Home sewing patterns rarely do. Something I find slightly annoying as it reduces accuracy in sewing perfectly aligned pieces. As you may know from experience, 1/4 inch off can really mess things up.
I'm not going to give very detailed directions on sewing the hi lo dress, as there are so many tutorials on the net for these techniques but I will highlight them so you can research or Google how to do them elsewhere if you aren't familiar with them yet. I have a really great sewing book by Connie Amaden Crawford, an old teacher, called Fashion Sewing, I like to reference.
Following sewing directions on the internet can get a little wacky sometimes!
Order of sewing for the dress:
Serge or zig zag raw edges. If I had had more time I would have sewn French seams but this is the quick way here.
TOP
Sew or serge the side seams of the top. If sewing press open seams and if serging sew another stitchline with your normal sewing machine to reinforce the seam.
Iron under seam allowance and fold casing over 1 inch. Stitch as close as you can to the edge, leaving a small opening for the elastic.
SKIRT
Sew the side seams then hem the skirt with a very narrow or rolled hem.
Gather the waist of skirt to the same size as the bodice width.
Sew the waist casing.
Pin the skirt to the top and sew with a 1 5/8 seam allowance. Iron the waist allowance upwards folding under the seam allowance.
Stitch the seam allowance 1 inch above the waist.
Leave a small opening to insert elastic.
ELASTIC
Cut two pieces of elastic 2 inches smaller then the upper chest and the waist. Insert and stitch closed the small openings.
Done!
Linked to
If you would like to see more sewing and craft related posts consider adding Sew Country Chick to your rss feed reader. Or follow with Facebook, Twitter, or Friend Connect!


Can't believe you pulled that off so fast! And Ken looks a like a creeper. I'd keep an eye on that guy.
ReplyDeleteIsn't Ken just to much!
DeleteBeautiful dress. That fabric is gorgeous!! Always more room in my closet for more summer dresses!
ReplyDeleteCongrats to Isabelle.. Such a fun & scary time in our lives. She is beautiful[as is her new dress] and know she will have a great future ahead of her. But, oh how I know,
ReplyDeletehow sad and happy to watch that baby girl reach that "grown up" stage. hugs to you!
I am so happy to you girls and the fun you had at the get together.. Can't wait to see the photos..
Thanks so much Judy. You are so nice. Hugs to you too.
Deletelooks great!
ReplyDeleteI love this skirt and how detailed the pattern is. I found you over at Make it, Wear it. I'd love to see you over at my new link party - http://www.amouseinmykitchen.com/2013/06/pin-it-proudly-link-party.html
ReplyDeleteHope to see you there!
Gorgeous! I want one like it for myself, that fabric is to die for!
ReplyDeletewww.domesticblisssquared@gmail.com
Love the dress! And congratulations to Isabelle on graduating! I'll have to give the tutorial a try for my oldest girl.:)
ReplyDeleteThanks Cindy, this would make a great beach cover up in the right fabric.
DeleteGreat tutorial! Thanks for it! Will try it sometime soon! New follower now! Would you be so kind as to pass by my new sewing blog also and follow? My FB is fb.com/MySewingHabit, instagram @reynalay
ReplyDeleteReyna
www.MySewingHabit.blogspot.com
Your daughter is gorgeous! The dress looks fabulous on her! Great job!
ReplyDeleteYour daughter is breathtaking!!! Such a beautiful girl! I know you must be so proud of her! I love the dress - I need to search your blog for tips on sewing with silky fabric! And is that Isabella in the Galaxy dress too?
ReplyDelete