Image Map

Sunday, September 29, 2013

Vintage Fabric Collecting Adventures


I have been going a little wacko with my fabric collecting the past few months. I don't spend anything on new stuff really, and actually I spend very little on fabric at all, but somehow I have amassed tons of it!

Here's one story: The artistic director of the theater where I occasionally work as a costumer e-mailed me to say the lighting director's father had gone into a nursing home and they had to get rid of his deceased mother's fabric collection. Could I stop by that day to look it over and take what I wanted before they donated it all? The director had also let the other costume designers know about it, but most of them live far from our little town. Lucky for me I was ten minutes away. I was going to be be the first person on the scene. I didn't have any important plans (besides having a dinner party in exactly two hours with people my husband had invited and who I hadn't met yet. ) Actually, I still had to go to the grocery store because I hadn't even bought the groceries for the dinner yet, but hey, I could spare a few minutes to look through approximately forty draw string tied Hefty bags of fabric couldn't I ? OF COURSE I COULD!!


As I read this e mail to my 10 year old over our usual chicken burritos at La Terraza she said. "Mommy, you have that look in your eyes again." She thinks I have a problem. She's probably right. I dropped the girls off at home after we finished our burritos and then headed to the theater. When I was let into the room with the fabric my jaw almost dropped. I was shown piles of bags and boxes of vintage patterns and asked to try to not make much noise because there was a matinee going on through the partition wall. Then the door closed and I was alone with a mountain of fabric and exactly forty minutes to go through it all because I had to get back for my dinner party and still go to the store. My hands were shaking as I tried to neatly go through the piles and tie up the bags neatly afterwards as I piled up linens, striped cotton knits and funky sixties and seventies prints. It was like a dream!
  
But what am I going to do with all of this fabric now???

On Fridays I go to estate sales and this is where I buy most of my vintage fabrics and craft supplies. I have a post about my estate sale shopping adventures here. Sometimes it's just a wee bit morbid going to estate sales. Lily gets kind of creeped out going through old people's things so I don't bring her anymore. Gigi loves it, but I worry she is going to end up an eccentric like me if I keep bringing her.

 I also find other cool things besides fabric. Like this past week I bought several rolls of sixties wall paper for two dollars. I can't wait to make something with it! However, most of the time I don't really find much, maybe a small bag of zippers and bias binding, or some wooden embroidery hoops. 

This past Friday I was in a house and there was a bag of embroidery stuff for sale. There was a beautiful embroidery project still in it's hoop that was almost finished, except for one letter that hadn't been embroidered. It said, "Families Are Forever." I thought about the old woman lovingly made it  and now her unfinished project was lying there at her estate sale. I picked it up to buy it so I could finish the embroidery for her, but there was a big stain on it. So I didn't. But I really felt for her.

I figured it's about time I share some of my vintage fabric goodness with the world at large and so I'm starting to sell little things to make and put in my Etsy shop which isn't up and running yet, and I have two craft fairs coming up. Just taking the pictures themselves and writing all of the details is so time consuming, almost more than making everything!

Here are a  few things I made this week with some of my vintage fabrics. And lots more in the making!


Are you new to Sew Country Chick and would like to keep up with the weekly tutorials and handmade goodness? Sign up for an e mail subscription here!

Saturday, September 28, 2013

Melissa From Melly Sews : Paying Me a Visit

Hi Sew Country Chick readers! I'm Melissa, and I blog at Melly Sews and design Blank Slate Patterns. Sewing Summit was the second time I got to meet Justine, (the first time was at LA Fabric Weekend) and so today I'd like to tell you some things about her.

Top 5 things you should know about Justine

5. She is super friendly. I ran into her at the train station and we took the train together from the airport to our hotel. When we got off, I immediately consulted my phone to figure out where we were/where we needed to go. Not Justine. She walked up to the first person she saw and asked. And when that girl didn't know, she proceeded to the next person. I think we figured out directions at the same time, but through totally different methods. sewing-summit-melissa 
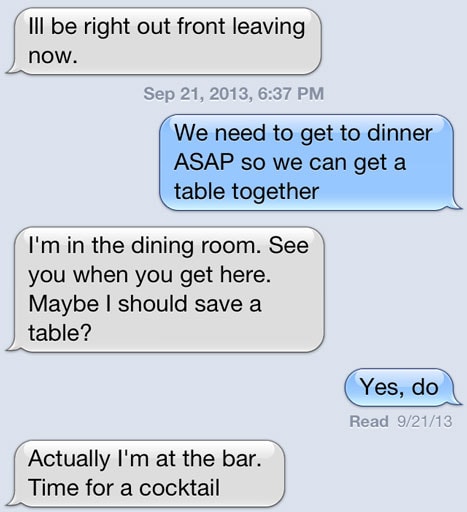
4. She is way more impulsive than me. I think she decided to come to Sewing Summit like 4 days before it actually started. Also see this actual text exchange between us (I'm in blue) for an example. photo-1
See what I mean? I joked a couple of times that she reminds me of Dory from Finding Nemo. Not a planner like me. More of a party girl, grown up. And lots of fun. 3) She was studious in classes (while making new friends). sewing-summit-melissa-3 
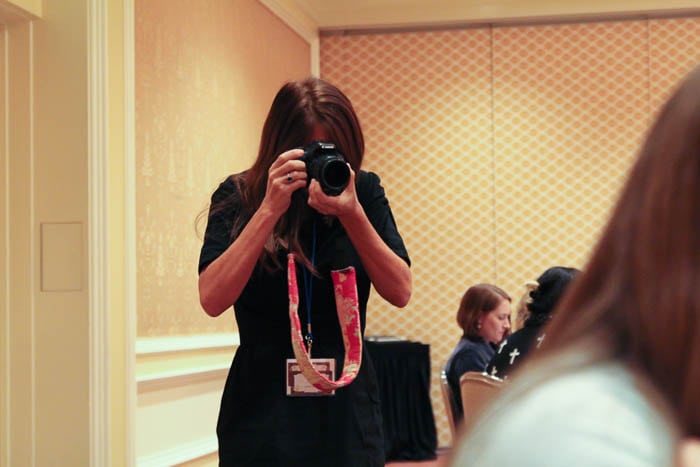
2. She was our own personal paparazzi - never forgot her camera (I was guilty of that) and often the best picture I could get of her was this one. sewing-summit-melissa-4 So I'm sure her post has way more photos than mine! 
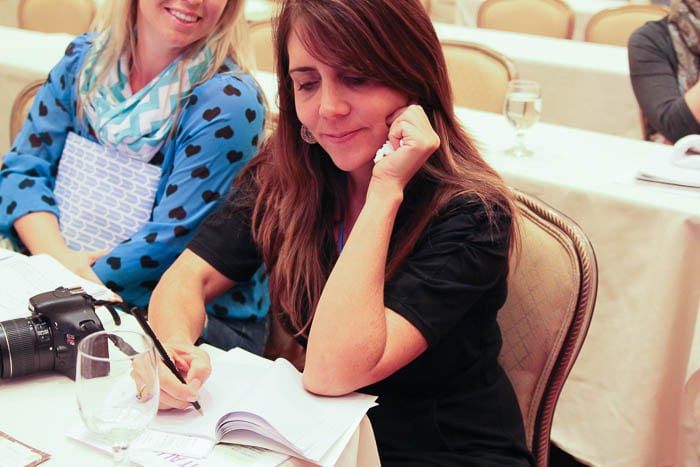
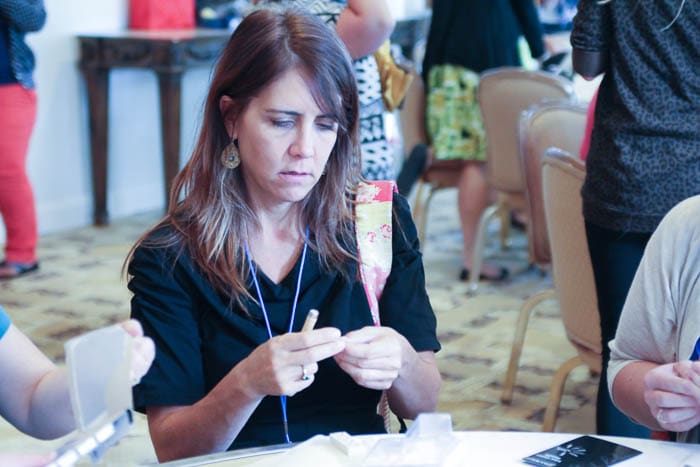
1. Justine really tries to do her best at whatever she's doing. See the studied concentration during the handprinting fabric class? Justine has great stories about growing up in LA and she is definitely a citizen of La-la land (as we lovingly refer to LA in Austin) but she also has a passionate streak, as I'm sure her loyal blog readers have noticed. She was constantly asking questions, networking (through her natural friendliness) and trying to improve. And I am so glad we got to hang out last weekend, privileged to call her a friend and thrilled to steal her blog and tell you about her. sewing-summit-melissa-5 I hope we get to meet up again in person sometime soon, and if you're curious about what Marissa of Rae Gun Ramblings wrote about me, come on over to my blog.
Facebook Pinterest Instagram Twitter

Here is a list of all of the bloggers involved in our stalking project and links to their posts today
 
Marissa of Rae Gun Ramblings writes about Melissa of Melly Sews
Jessica of Running with Scissors writes about Jen of I Candy Handmade
Melissa of Melly Sews writes about Justine of Sew Country Chick 
Caila of Caila Made writes about Veronica of Sew Very
Veronica of Sew Very writes about Jessica of Running with Scissors
Justine of Sew Country Chick writes about Caila of Caila Made
Jen of I Candy Handmade writes about Sabra of Sew a Straight Line
Sabra of Sew a Straight Line writes about Marissa of Rae Gun Ramblings

Friday, September 27, 2013

Icon Wall Sticker Winner

Congratulations to Olivia Hamilton!! You won the gift certificate from Icon Wall Stickers! I will be in contact with you! Have a great weekend!


Are you new to Sew Country Chick and would like to keep up with the weekly tutorials and handmade goodness? Sign up for an e mail subscription here!

Wednesday, September 25, 2013

Draping A Basic Block From A Dress Form


Today I'm draping a basic child's pattern block size 5 from my dress form.

If you sew, do you have a basic block yet? Learning how to make a basic block and then how to create some basic designs with it is one way to create your own patterns.
There are two ways to make your basic, whether you are making it for yourself, your child, or in my case, creating a pattern that you can eventually sell. ( Or maybe just give away.)

You can make a flat pattern, or you can drape your original block on a dress form like I did here.
If you are creating a pattern only for yourself or for your child, then I would recommend making a flat pattern based on the individual's measurements. If you are making a flat pattern, you will need a fit model to try the pattern on as you go, to make sure everything fits right.

If you want to make a pattern to fit different sizes, it's recommended you use a general size chart or a dress form . 


size chart courtesy of pattern.stringcodes.com
Commercial dress forms are created with industry sizing standards so you will have an industry standard fit in a range of sizes once it is graded.

What if you are NOT an average size, for instance, a very thin tall person with wide shoulders, or a busty, short person, or have a chunky child, and you draft a pattern based on that basic block you drafted for those not typical measurements then grade it up or down several sizes? Then you will have a pattern that will only fit a specific body type well. You may have some complaints if you try to sell that pattern.

For instance, I love Colette Patterns because they fit me very well in the bust area. I'm full busted for my figure, and it's very unusual to find a pattern that fits in that area without doing a Full Bust Adjustment or other alterations like lengthening the pattern in front, but Colette patterns fit perfectly. I have a feeling the original fit model for Colette Patterns was probably busty. Not the best news for smaller busted women, but great for me!

Most commercial patterns and clothing you find in stores for women are drafted for the average size B cup for women.

So let's see how I drafted my pattern, shall we?

I always mark GRAINLINES first, to make sure my pattern is on grain and balanced.
I line up my center front and back first and pin them down.
Then I smooth over the fabric as I go, pinning.
Making sure my CROSSGRAIN is straight, I  finish draping the basic bodice, clipping into the neck line and pinning and marking around the armholes. I use the flat part of the pencil to trace the side and shoulder seams on the form. It's very straightforward for this size 5 child's dress form. No darts.
I pin it together and readjust the fit. I had to make the armholes bigger.
After studying children's patterns I've learned learned that the average ease for a child's basic block is 2 inches. This allows for comfort and wiggle room.
Below is a chart I unearthed giving ease allowances for average ladies patterns.
That's a lot of ease!
Every designer has their own opinion about ease. I prefer close fitting clothing myself so I would use a minimum amount.

Then at this point I take off the pattern pieces and TRUE them up, using a ruler. I can add about 1/4 to 1/2 inch at the side seams to build in some ease one to two inches, to the basic pattern at this point. By the way, that 2 inches of ease is for woven patterns only. If you are making a knit pattern, there isn't as much. Sometimes knit patterns like bathing suits have NEGATIVE EASE, meaning the pattern is smaller than the body.
But the subject of ease needs it's own blog post!
 I also make sure all of my seams are the same length on both pieces, ( side seams, shoulder seams.)

I tape my pattern to manila and cut it out.
Below is my basic block. I don't add seam allowances to my basic block. I add them after I design. This makes it simple to slash and spread, etc.
Stay tuned in the next couple of weeks to see how I use the basic block to create a dress, and then how I grade it with a grading ruler.
Thanks for reading!
Here is link to another post I wrote last year where I made a basic pattern block based on the directions from a book and using Gigi's measurements as a guide:


Are you new to Sew Country Chick and would like to keep up with the weekly tutorials and handmade goodness? Sign up for an e mail subscription here!

Tuesday, September 24, 2013

Along Came A Spider Headband


Little Miss Muffett sat on a tuffet eating her curds and whey.
When along came a spider and sat down beside her and frightened Miss Muffet away. 

 However, this Little Miss decided the spider would look fabulous on a headband!

My kids aren't allowed to wear their Halloween costumes to school, but can maybe get away with wearing this headband.
Or maybe I will wear it myself!

It was a perfect project to make for my Craft Lightning post today, hosted by Country Chic Cottage and 30 Minute Crafts,  since it took only 15 minutes.

There will be 15 minute Halloween projects linked up all week. It started yesterday, so head on over to see more!
Would you like to make a spider headband in 15 minutes, too?
Here's how:
 I made this headband from a plastic spider and headband I bought at the 99 cent store and some ribbon from the hobby shop.
I used some little scraps of felt and my glue gun to put it together.
 I cut the felt into little ovals the same size as the spider body.
 From the ribbon, I cut two 2 inch pieces.
 I glued them to the bottom of the headband.
 I wrapped about two yards of ribbon around the headband, gluing down at both ends.
I glued down one piece of felt to the spider's body.
Then I sandwiched the headband in between the other piece of felt, which I glued .
Done!

Are you new to Sew Country Chick and would like to keep up with the weekly tutorials and handmade goodness? Sign up for an e mail subscription here!

Sunday, September 22, 2013

Mod Podged Wrapping Paper Frame

Lately I've noticed at the hobby shop that there have been some very cute rolls of wrapping paper in the one dollar bin.
I also had a blank wood frame that I bought a long time ago in my crafty cupboard.
The colors of the wrapping paper were going to match perfectly with a photo of Gigi in her Purple Pumpkin dress I hand painted from a white sheet. The dress I made for Project Run & Play the week I was voted off. I think this is one of my favorite dresses I have made her ever and ever.
 Original post here.
The light weight of the paper is perfect for Mod Podge projects! While I love scrapbook paper, it doesn't always work on projects that require wrapping, like this frame did.
Here's how to make a wrapping paper covered picture frame...
Start with an unfinished frame like the one above. They are just a couple of dollars at the hobby shop, or you use an old frame you have sitting around collecting dust. 
Cut the wrapping paper with about a one inch overlap as pictured above.
Add Mod Podge to the back of the frame and wrap the frame.
Let dry.
Once the paper is dry you can brush a couple of coats of Mod Podge over the frame to seal it and protect it. I used Mod Podge Antique to age the frame, I love how it does that, but normal Mod Podge will work just fine, too!

Thanks for stopping by. Stop by my blog sometime! Or visit on Facebook or Twitter.

Friday, September 20, 2013

Icon Wall Sticker Giveaway

I love typography projects. You've probably seen plenty of awesome lettered and graphic art on Pinterest too.
When a company called Icon Wall Stickers contacted me about hosting a giveaway for their jumbotypographic and wall art stickers I was excited for my readers.

 Icon Wall Stickers are giving away a Thirty Dollar credit to one lucky winner! 

Icon Wall Stickers make removable vinyl wall stickers with various quotes and designs.
They  are a bold, modern, and commitment free way to make a modern decorating statement!
Here are a few of my favorite stickers I came across when browsing the site. There are hundreds of designs to choose from and you would have to head over there to see them all.
If you have a big, bare wall it's a great decor idea. This would be perfect in a dorm room or rented apartment, since they are removable.
These stickers can also be ordered in various colors.


This Giveaway Ends at Midnight Thursday September 26th.
Fill out the Rafflecopter widget below to enter!


a Rafflecopter giveaway If you would like to see more sewing and craft related posts consider adding Sew Country Chick to your rss feed reader. Or follow with Facebook, Twitter, or Friend Connect!

Wednesday, September 18, 2013

A Homegrown Breakfast & Happy Mail

This may look like an ordinary breakfast but there is something very extra special about it....

Everything on this plate was grown in our garden, thanks to Richard, the ultimate gardener.
The eggs are from our chickens, which he feeds and keeps clean. The tomatoes and melons are from the seeds he planted, and the avocados come from our small grove of avocado trees.
How does he do it?

Farm fresh food!

 I can't claim any credit because I have what you call a brown thumb.
I just don't have the patience or energy to nurture plants.
Even my poor fishbowl cactus terrarium withered away.
Have you ever watched the old sixties TV show Green Acres? I can relate to Zsa Zsa Gabor's character. 

When we first moved here from the city, I confused baby goats with baby sheep and would get freaked out running through the orange groves.
I had a beautiful Quarter horse but had to give him up because I was too wimpy to handle him and wasn't prepared for how much work raising a horse actually takes.
He was huge and very intimidating and I could tell he resented having to deal with me since he had been a show horse in his younger years. 
How had he ended up with the likes of me?
The harsh sun outside on the horse ranch was also frying my skin....
But I really loved dressing like a cowgirl!


In other news, we found my old iPhone in my husband's car when he had some work done to it and now I have two iPhones. So I'm sending one to my son at college, and I made him a little cozy for it from an old felted sweater. I just threw this together, and I doubt he will really use it, since it will be way too bulky to fit in his jeans pocket. But it will be protected it in the mail!
Would you look at this box I got in the mail courtesy of Joann Fabrics? I'm not sure what I'm going to do with it all , but stay tuned for some posts about Fabric painting, etc. I'll have to put my thinking cap on.

I'm off to the Sewing Summit in Utah tomorrow! I'll be meeting up with blog friends and taking lots of interesting workshops. It's the first time I will be sleeping alone in a hotel room in too many years than I care to admit. I haven't actually slept alone in a hotel since I was a twenty year old traveling through Europe alone. I've always had either my kids or my husband with me.
Wish me luck!


If you would like to see more sewing and craft related posts consider adding Sew Country Chick to your rss feed reader. Or follow with Facebook, Twitter, or Friend Connect!

Tuesday, September 17, 2013

Estate Sale Shopping Tips


Estate sales My husband and I have always liked collecting old things and have been going to private estate sales on and off for years. Besides our sofas, beds, and appliances, most things in our home are vintage.
My husband has taken up welding as a hobby and is looking for vintage tools to outfit his shop and I'm always on the hunt for vintage fabrics and sewing supplies.
 I get e mails every week letting me know when and where the estate sales are and sometimes if the photos interest us, we go. This sale was on an old ranch and there were going to be several outbuildings, plus a house full of stuff, so we decided to go.
When going to an estate sale it's important to try to get there early. Sometimes people are lined up and waiting a half an hour before it opens, like vultures. Extreme Pickers. Most of them are antique and junk dealers who resell the stuff they find at estate sales at either the flea market or on E Bay. But some of them are people like me and my husband, on the hunt for something unique and just curious to look around.
  
I suppose a lot of people might think it's weird to go and look around at estate sales. And many might think it's even weirder to bring your kids, but I didn't have a babysitter so the kids had to tag along. There is something morbid and sometimes depressing about looking through people's things for sale. Sometimes a person has died and the family is selling everything off, sometimes an older person is moving into a nursing home and needs to unload their posessions: you can't fit much in those little rooms, sometimes people are just moving, and sometimes people have fallen on hard times and liquidating. That's a lot of sometimes.
Often, a professional company handles the sale and things are very organized and then there are the times a family member has died and the immediate family is handling the sale, clearly distressed and confused about what to charge for things. Usually when a company handles the sale the prices are higher because they take a cut but sometimes the seller is highly motivated to clear EVERYTHING out and thus, incredible deals can be found.
estate sale tips
 If you are planning on going to an estate sale you should always bring some kind of box to put things in as you shop. I didn't need this giant box as I bought only a few sewing notions and a vintage Pyrex dish but I was prepared anyway!
 This sale was a terrible mess. The company who handled this sale did a bad job of preparing things  in my opinion. AND their prices were too high. We took turns watching the kids so they didn't get into anything too dangerous. There were a lot of sharp tools just lying around.
estate sale tips Don't forget to negotiate when buying things at an estate sale. Unless you feel the price is great or feel guilty low balling people. If the seller is a family member I usually just pay the price they ask or ask for a small discount. You have to feel out the situation out case by case. it's a personal thing, estate sales and you need to be respectful. You don't want to seem like a vulture.

I'm always on the look out for sewing machines and this house had two, an entry level Brother from the 90's that wasn't worth the bother, and this old Singer which was cool looking, but I DON"T need. But it was fun to look through the drawers, etc. 
 
This machine was from 1941 according to the manual I found in the drawer.


I did find some packages of bias tape and rick rack and a little fabric, but not much else besides a vintage Pyrex dish.


My daughter had fun hula hooping and my husband waited for me because I always take way longer than him to poke through things. I became engrossed in an old box in the shed full of old photos and old letters, trying to piece together this person't long life. According to this photo they graduated Robert Fulton junior high school in 1961, wherever that is.
Then everyone came to get me to tell me it was time to leave. I wonder if someone will be looking through my old things one day? I'd better keep them organized just in case!

 This truck belonged to one of the dealers who showed up. He restores cars and looks for parts.

And while going to esate sales isn't necessarily the most wholesome family outing it's just what we do sometimes. Hopefully my kids won't end up too eccentric because of me!

If you would like to see more sewing and craft related posts consider adding Sew Country Chick to your rss feed reader. Or follow with Facebook, Twitter, or Friend Connect!
Related Posts Plugin for WordPress, Blogger...